
In order to explain how Logical Desktop works, it is better to consider a situation where all the panels are open at the same time.
In this screenshot of Logical Desktop, you are presented with four panels: the verb panel, the file panel, the program panel and the device panel:

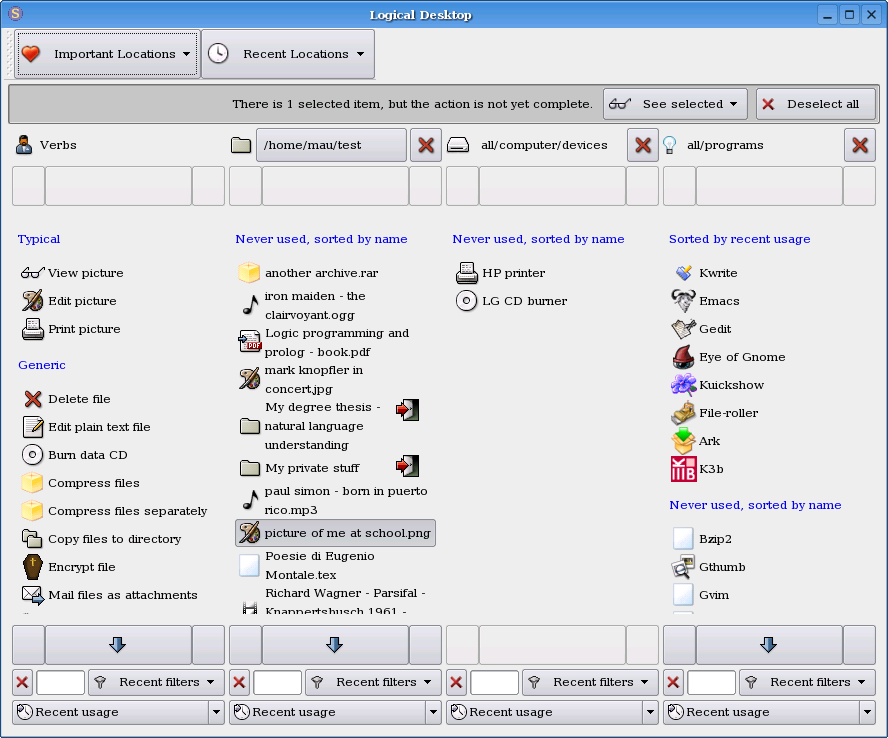
What happened?
The program automatically hides the things that don't make sense with the current selection. We say that the lists have been narrowed to show only the useful things.
Hiding (narrowing) is not the innovation of Logical Desktop; the concept of information hiding is very old, even in the field of user interfaces: for example, it is common for an application to hide the files it cannot manage. The real innovation of Logical Desktop is
The actual technique used by Logical Desktop to treat files, verbs, devices and programs in a uniform way is called "reciprocal incremental list narrowing", or simply "narrowing".
First let me explain the "incremental" part. Logical Desktop's list narrowing is "incremental" because it acts on the cumulative selection. What does it mean? Select the program "the gimp", leaving the PNG selected, and see what happens:
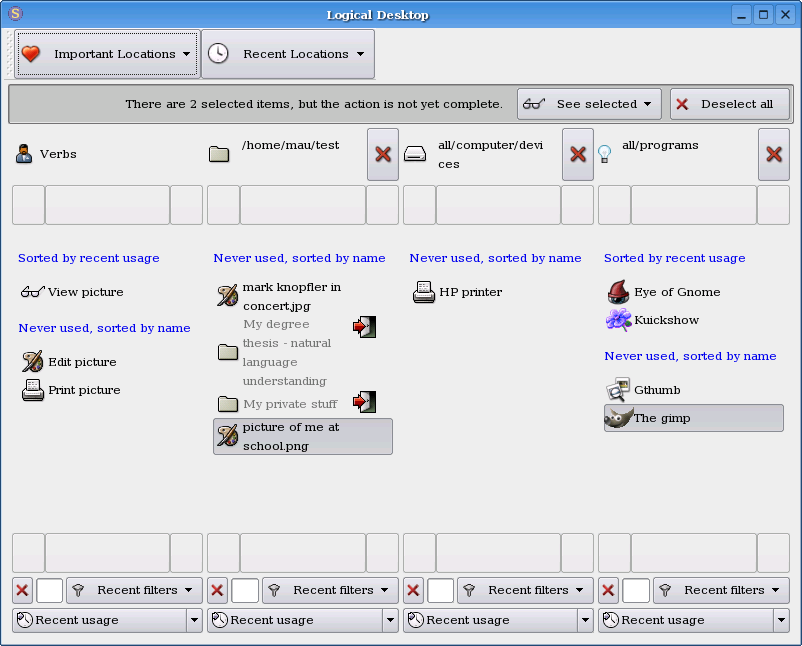
This explains the use of the word "incremental".
What about the "reciprocal"? This is the most important part. Logical Desktop's lists are reciprocal because selecting an item from any list triggers narrowing of that list and all the other lists. We have just seen this: selecting Gimp hides some programs but also some files, some verbs, some devices. So, where is the reciprocity? In this case, here:
You are beginning to see the potential of this idea now? ;-) But wait, this is just the beginning.
So far we have been following the traditional "file-oriented" style, where you select a file for first, and then the rest (a verb, a program, a device...).
Now we shall see that Logical Desktop allows many other styles: task oriented, device oriented, program oriented. We shall also see how an action can be executed.
Suppose you want to view a picture, but you are new to Linux and don't know how to do it. Deselect all, and select the verb "view picture".
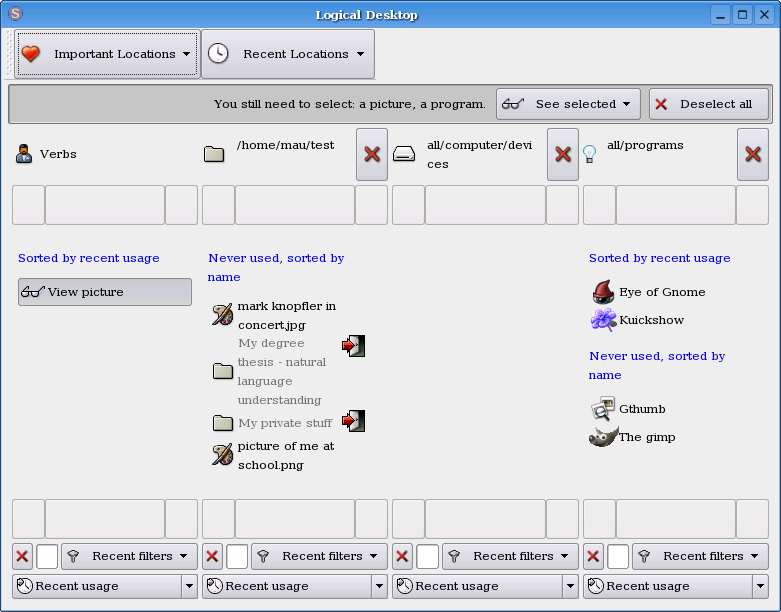
What happened?
|
The little sentence that reminds you
Notice the blinking sentence on the grey bar, which reminds you what is missing in order for the action to be complete. In this case, the program and the file are missing. This is an invaluable aid to understand what's going on. Futhermore, the user has a feeling that the computer is really understanding what he wants to do. |
Of course, if you had selected "Edit pictures" instead, you would only have seen the program "Gimp":
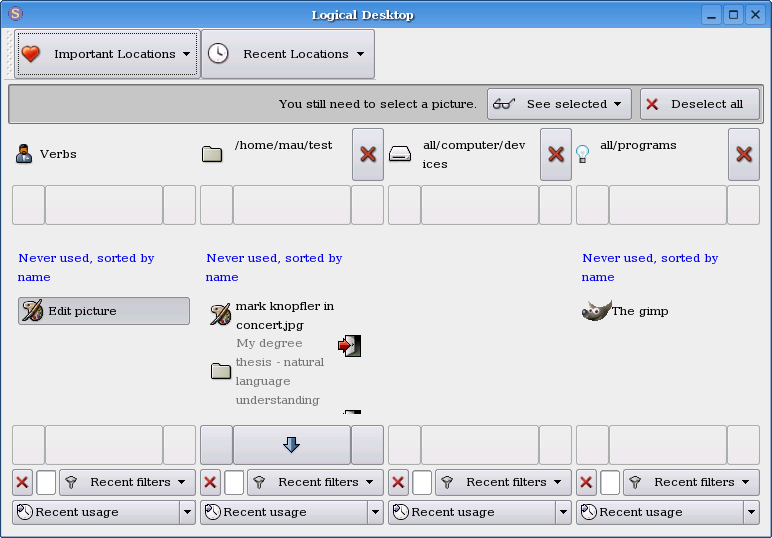
Yes, but how did you find the picture? You had to scan all the files in the folder with your eyes. This is why traditional systems use folders: to organize your files, in order to scan them more quickly with your eyes. Sadly, newbies don't organize their data. They tend to put everything in their home folder. Furthermore, even if you are NOT a newbie, and use many well-arranged, hierarchical folders, reaching the folder takes much time, and many clicks. Also, organizing data takes time. Finally, you have to remember where you put your data.
With Logical Desktop, if you don't organize your data, there is a trick that that greatly reduces the list of files you must scan: selecting the files last. It is better to select the most "meaningful" thing first---that is, the one that "cuts" the most files. For example, if you want to print, it is better to select the printer first. Or the verb. This will hide many files, thus making easier to find the right file.
Example: We want to print a PNG. Since we are smart, we decide to select the device first:
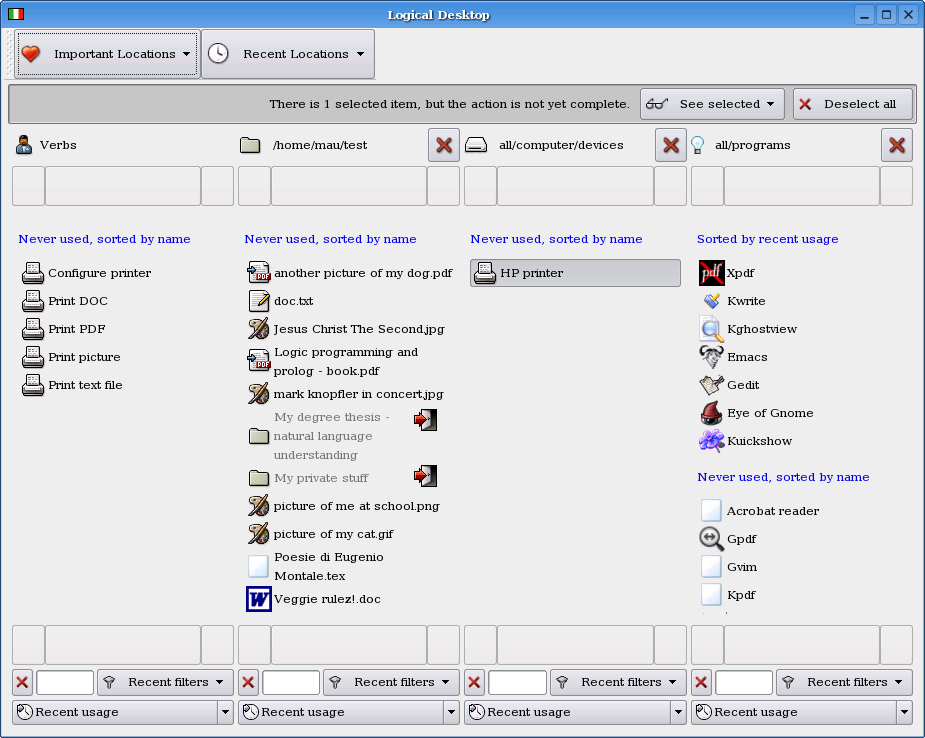
See how the files have been narrowed to only those files that can be printed? Wait: don't select the file yet. Select the verb "print picture" instead:
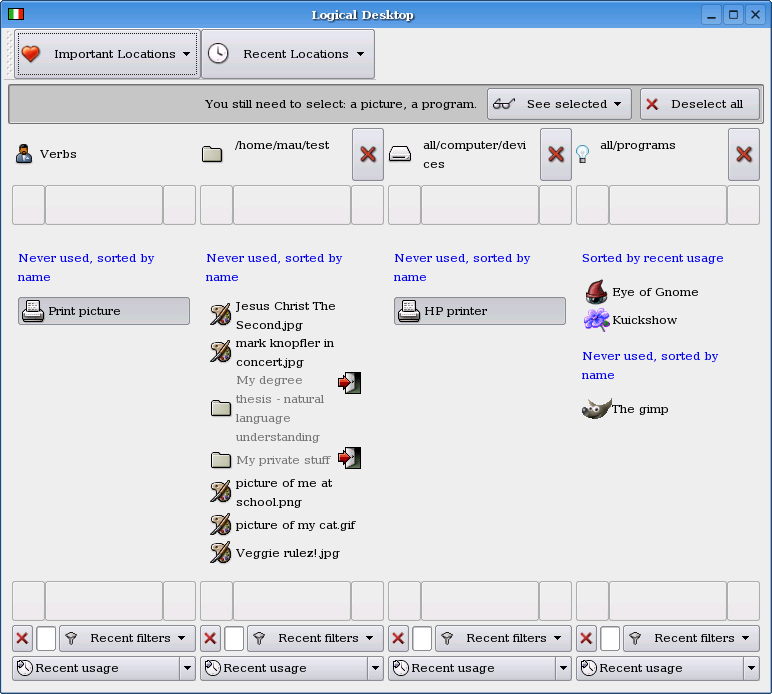
Now you only see the pictures in the current directory, therefore it is much easier to find the right one to print.
Please notice how important it is to be able to select verbs, devices, programs and files IN ANY ORDER.
Many people have objected that "devices are useless". Nothing could be farther from the truth: selecting the device FIRST makes you spare time LATER, when you must select the file. That's the beauty of narrowing. :-)
Now we shall see how to actually execute an action.
First of all, locate the computer. Click "important locations", then "all", then select the computer:
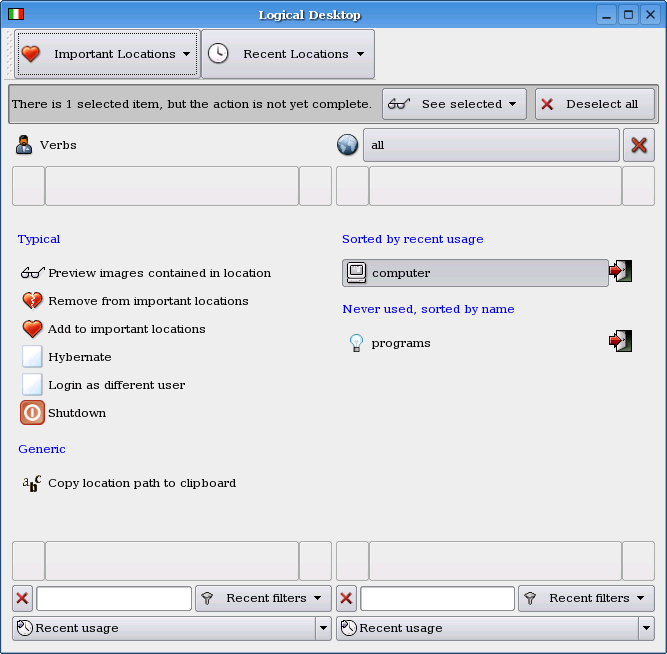
Once again, all the things which don't make sense with this device have disappeared. In particular, all files and programs have disappeared, and only three verbs remain.
Of course you will select the verb "shutdown":

The execute button appears, and you click it. The action is executed.
Long answer: you may have noticed there are two toplevel lists of locations: "important locations" and "recent locations". You open those lists by clicking the big buttons on the toolbar.
At first, the "recent" list is empty, and the "important" list contains a single location: "all". "all" is similar to "Desktop" in Windows: it is the toplevel root location of a virtual hierarchy.
Click the location "all" in the important list. Then the location will be opened in a panel, besides the verbs. You will then see the items contained in "all", which are two sublocations: "programs" and "computer". Then enter "computer", by clicking the small door-shaped icon, and you will see two other sublocations: "devices" and "files". Again, enter "files", by using the door-shaped icon, and you can see the filesystem (starting from /). Then you navigate in the directories as usual.
Notice that you have to traverse the path /all/computer/files/ only once; later, you just pick the location you want from the recent list.
You can also add a frequently used location to the bookmarks, with the verb "Add to important locations".